
A Guide to Evidence Management
Best Practices for Evidence Room Management & Securing the Chain of Custody
The chain of custody is only as strong as its weakest link. An evidence manager’s job is to be sure that every link in that chain, from the crime scene to the courtroom, is strong enough to withstand challenges from the defense during a criminal trial. That means proving to a jury beyond a reasonable doubt that there’s no way evidence could have been tampered with or compromised at any point during police custody.
What does this look like from an evidence room management perspective? Every piece of evidence that enters an evidence management facility moves from the custody of a police officer to evidence technicians and eventually back again, and every stage needs special attention to ensure the chain of custody is preserved.
Or continue reading below.
Get tips, best practices and start planing for evidence management.
Evidence Packaging & Labeling
This step is of vital importance because properly packaged and labeled evidence is easier to keep track of and is easier to confirm as uncompromised. Improperly labeled evidence, on the other hand, or evidence that is not in a sealed box or bag, can get lost or be subject to challenge.
How to set up an evidence packaging station:
1. Locate a desk, table, or other workspace near the evidence intake area.
Keep it clear to prevent potential contamination of evidence.
2. Store supplies in a convenient location.
Supplies include:
- Rubber gloves
- Forms
- Evidence bags
- Evidence boxes of various sizes
- Pens
- Evidence tape
- Heat sealer (for sealing bags)
- Scissors
3. Ensure that supplies are replenished regularly.
If an officer leaves evidence unattended to go looking for supplies, that’s a break in the chain of custody.
4. Post protocols for easy reference.
Receiving Evidence
After evidence is properly packaged and labeled, it’s ready to be handed off to an evidence technician. At this point the evidence is leaving the officer’s custody and it must be secure.
Options for receiving evidence:
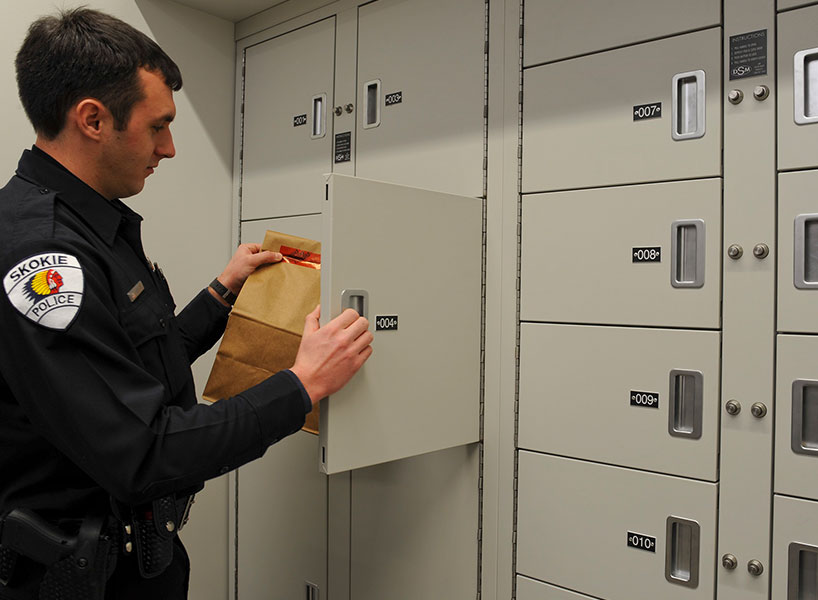
1. Pass-through Evidence Lockers
This is the simplest and most secure way to transfer evidence from the officer’s possession to the evidence room. An officer places evidence into a locker on one side of a wall and secures the door, and then an evidence technician retrieves the evidence via an access panel on the other side of the wall.
2. Non-pass Through Evidence Lockers
An officer deposits evidence into an evidence locker and secures the door, and the same door is opened later by evidence technician.
3. Hand-carried Evidence
Every department should have a protocol detailing how hand-carried evidence is to be transferred from an officer to an evidence technician.
4. Mailed Evidence
As with hand-carried evidence, the department should have a protocol for sending and receiving mailed evidence.

Get the Evidence Management Guide Book
Evidence Pass-Back
Evidence needs to be passed back to officers for presentation in court. Also, evidence that was improperly packaged or labeled needs to be passed back so the submitting officer can correct mistakes. Evidence can be passed back in person or with a pass-back locker or so-called “trouble locker”. No matter which method is used, the transfer must be documented according to protocol.
Long-Term Evidence Storage
Depending on the crime and applicable regulations, evidence might be held for a few days, a few decades, or, in some cases, forever.
How to set up a long-term evidence storage area:
1. Designate a Safe, Secure Area
Depending on the size of your department or agency, you might set aside a room, a large area inside the building, or an entire facility for evidence storage. No matter the size, the principles are the same: the area needs to be completely secure, with no possibility of unauthorized entry. Also, according to IAPE regulations, the area should be safe from fire, floods, tornados, and other natural disasters, and it should provide adequate lighting and ventilation for staff.
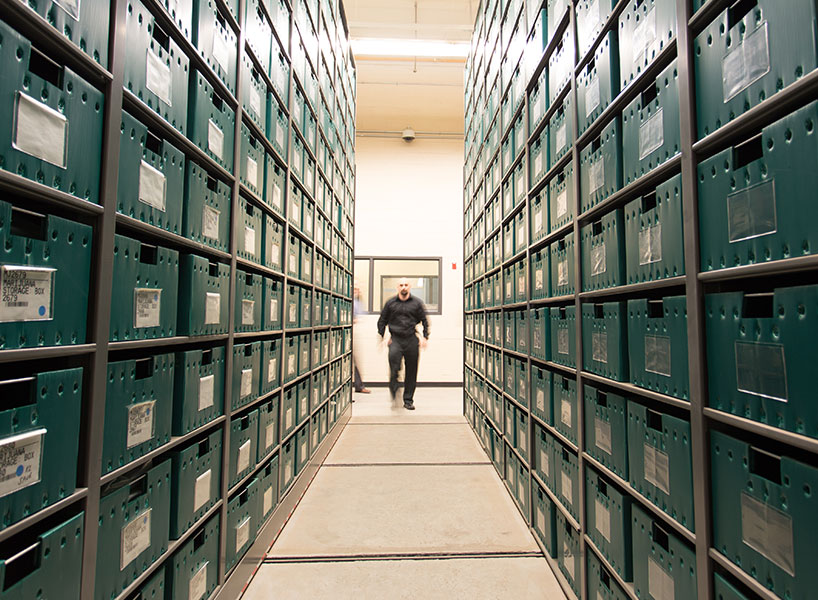
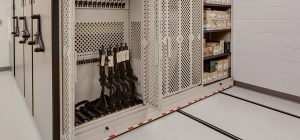
2. Overcoming Space Limitations
If overcrowding is a problem, expand capacity with high-density shelving. Shelving moves along rails in the floor to compactly store evidence while also keeping it organized. Staff can open aisles with handles or electronic control for quick access.
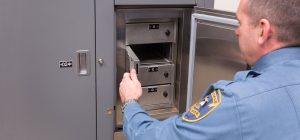
3. Cold Storage
Biological evidence degrades relatively quickly at room temperature, so it’s often required to be preserved in cold storage. Consult with the forensics lab in your jurisdiction to obtain relevant storage protocols for biological evidence. If cold storage is required, high-density storage is useful in walk-in coolers and freezers, permitting full access while taking up the least amount of space possible.
4. Guns, Drugs, Cash, & Other Valuables
High-value evidence should be stored under additional layers of security to prevent unauthorized access. Learn more about storing valuable evidence.
“The use of high-density (mobile) storage shelves is the most effective method to significantly increase storage space.”
“– IAPE Professional Standards
Purging Evidence/ Returning Property
Evidence can be purged after the District Attorney or other jurisdictional authority gives permission. Purging evidence might involve responsible disposal or returning the property to its owner. Statute of limitations regulations vary depending on the alleged crime and jurisdiction, so be sure to consult with the proper authorities before purging evidence.
Tracking Evidence
Evidence should be tracked all along its journey. There are a variety of commercial software options for evidence tracking, or your department or agency can devise a proprietary system.
![]()
Looking for more information on evidence storage and best practices?
What's Next
Tips & Best Practices for Biological Evidence Storage
How to Secure Guns, Drugs, and Money in an Evidence Room

4 thoughts on “Best Practices for Evidence Room Management”
Comments are closed.